Pages

Showing posts with label lace. Show all posts

Tuesday, July 19, 2011

DIY: Refashioned Straw Bag

Dear Summer, I miss you so much. Winter has been cold and dreary. I want you back.
I guess you can tell how much I am missing summer right now. I could go crazy trying to keep warm in this cold and thinking about all the fun I had last summer. In preparation for Summer 2011, I made a refashioned straw bag! Whoopieee! I have always been inspired by Japanese fashion and this straw bag is a perfect example of its influences on me. Here are some of the pieces that inspired me:
(via)
(via)
I bought my mini straw bag from a thrift shop for just $4 over a year ago with the thought of making it look better, and finally got around to refashioning it this year. Do you like it? You can make a similar one following the steps below, or Google ‘japanese straw bag’ for more inspiration.

Materials:
Straw bag
Bits of different lace trimmings and ribbons
Glue gun

Steps: 

1. Use glue gun to glue a thick, ‘holey’ lace all around the middle of the straw bag. 

2. Use glue gun to glue another lace fabric slightly above the lace used in the previous step. 

3. Tie ribbons and glue them wherever you like. 

4. Add extra trimmings around the bag if you like.

I only used white trimmings for my lace bag because I didn’t want the trimmings to overwhelm the entire bag. Also, I was awfully scared of not being able to carry off such a feminine-looking bag. 

So, here you are, a very short and simple tutorial for the summer. I can’t wait to use this bag when summer comes!

Friday, November 19, 2010

DIY: Refashion Chambray Shirt to Skirt with Lace

I said that I would keep true to my promise...

and so, here you go! This is a skirt made from an OVERSIZED chambray button-down shirt that I thrifted. I was planning on wearing it as a real shirt but then I realised it's really just too big for me. I felt that the shirt was actually mocking me when I looked at myself wearing it in the mirror. Then somehow I heard my sewing machine sobbing in a dusty corner of my room and thus I decided to cut the the shirt up and sew it into a skirt.

P.S.: I also cut my hair today.

Materials:
Oversized shirt of any material or pattern that you fancy. It doesn't really need to be very big, just large enough to fit your bottoms in...

Sewing machine. You can also sew this by hand if you feel that you have a lot of time to spare.

Lace trimmings. Enough to go around the bottom of your new skirt TWICE.

And now we make the skirt:

Steps:


Friday, July 16, 2010

DIY: Rosette and Lace - Refashioned Tee

Wheee! Another DIY post! These babies just keep rolling in, don't they? I am loving this winter break.


I've been thinking of doing a simple refashion project for a long time. Then something happened and I HAD to do it. No prizes for guessing what it is because I'm going to show you the pictures of the rather unfortunate incident.


Yes this is what the washing machine did to my tank top. It ripped it right across at the back! And how unfortunate that it's not located at some place where I can do some strategic sewing or patching. Oh whatever. 


What is done, is done. So I simply cut the strip, gathered a few beads, a section of lace ... and got this after less than 30 minutes.


So, if your washing machine is also an angry, tank-ripping machine, come follow the steps and create your own refashioned Rosette and Lace Tee!


Materials:
Plain top
1 strip of t-shirt
Pearl and clear beads
Lace
Sewing needle and thread


Steps:
NOTE: You may want to practice the steps and see if you like how your rosette looks before attempting to sew it into position.


Sorry about the orientation. That's Blogger trying to smart and rotating my pictures...


1. Cut the bottom of your tee (the hem) to yield a 36cm strip. You can use a longer strip to make a bigger flower or a shorter one to make a smaller flower.


2. Fold down to create a triangle at one of the ends. Sew into position.


3. Crease the lower part of the strip and fold it towards the triangle. Sew into position.


4. Crease at a lower part along the strip again, this time a further distance away from the 2nd crease. Sew into position.


5. Turn the strip towards the first triangle to cover the bottom part of the triangle. Sew into position.


6. Crease and turn it anti-clockwise. The first triangle should be partially covered. Sew into position.


7. Fold the strip down while turning the strip anti-clockwise. Sew into position.


8. Continue folding and turning at random and sew into position. You should get a rosette that looks something like this. It's ok if your rosette looks lightly different from mine. That's the beauty of it! 


9. Sew the rosette onto your plain top. Don't sew it all around the edges because we need to add the lace! Sew beads to the centre.


10. Get a section of lace. 


11. Fold the straight edge of the lace left and right like an accordion. Sew it in place.


12. Tuck the folded bit of the lace into a corner of the rosette. Sew it in place.


13. Tuck the 2 ends of the lace under the rosette and sew it in place.


There you have it, a t-shirt flower with lace as its leave. (^_^)


Hope you like it!


P.S.: Ok, so you may be thinking that I still have the rest of the tank that I have not cut and used... Well, I'm keeping them at the moment and waiting to see what comes to my mind. I don't want to waste an inch of the tank!!!

Thursday, October 2, 2008

Mad about sewing zips!


I have completed knitting a sweet lilac purse with lace patterns a few months back. It is was intended to be given to a colleague of mine who was leaving. Well, she has already left for a few months but the purse is still incomplete.

Actually the only thing that was left to be done is to sew zips to the openings of the what I have already knitted. But it's really a torture to sew the zips. I mean REALLY. I never had that stamina and patience to sew the zips on, stitch by stitch, taking care that the stitches don't show on the right side of my knitted work.

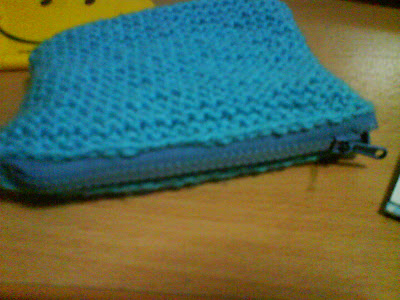
It all started with this blue purse, the maiden project completed by my knitting "student", a friend of mine who is working in the same clinic as me. So as a "teacher", I had to encourage her to continue to knit by allowing her to have her very first, completed knitted project. It was also the first time I tried sewing zips onto a knitted piece of work, so I finished up pretty fast with my enthusiasm. I even added a teddy backing into the purse! Yes it was A LOT of work.

I think it looked really neat!
So, for a while I had a phobia towards sewing zips by hand.

But looking back, I think I'm now ready to get back to the work. Moreover, I think I should be meeting up with that colleague of mine soon. (^_^)

Saturday, July 12, 2008

Because I still have so much yarn left

It's quite scary to realise the amount of yarn that I have left (3 balls, 100g for each ball).

Though I have plans to make a matching hat, I still haven't really found a design that I like and one that isn't too challenging a beginner like me. I think after making a hat I'd be able to make mittens and still have at least a ball of yarn left.

But right now my hands are itching again as I surf around the net for a hat design that I like to match with my scarf. So I decided to do a small project first.
I think the lace pattern just looks so sweet in this shade of pink!


At the very very beginning I was thinking of making a headband for myself (and then if it turns out nice, for my friend as well). I got a free, downloadable pattern for lacy headbands from KnitPicks and chose pattern C, the Sheraden Ann Headband. Then as I was working on it, I realise that it's actually kind of wide for my small head. So I decided to make it into a pouch for my new Creative Zen MP3 player instead since I have been dropping it accidentally

I just love this lace pattern. Hopefully I'll be able to find a nice hat pattern with this lace pattern!